# ⛵ Cluster Template Welcome to my opinionated and extensible template for deploying a single Kubernetes cluster. The goal of this project is to make it easier for people interested in using Kubernetes to deploy a cluster at home on bare-metal or VMs. At a high level this project makes use of [makejinja](https://github.com/mirkolenz/makejinja) to read in a [configuration file](./config.sample.yaml) which will render out pre-made templates that you can then use to customize your Kubernetes experience further. ## ✨ Features The features included will depend on the type of configuration you want to use. There are currently **3 different types** of **configurations** available with this template. 1. **"Bare cluster"** - a Kubernetes distribution of your choosing: [k3s](https://github.com/k3s-io/k3s) or [Talos](https://github.com/siderolabs/talos) - **Required:** Debian 12 or Talos Linux installed on bare metal (or VMs) and some knowledge of [Containers](https://opencontainers.org/) and [YAML](https://yaml.org/). - **Components:** [Cilium](https://github.com/cilium/cilium) and [kube-vip](https://github.com/kube-vip/kube-vip) _(k3s)_ 2. **"Flux cluster"** - An addition to "**Bare cluster**" that deploys an opinionated implementation of [Flux](https://github.com/fluxcd/flux2) using [GitHub](https://github.com/) as the Git provider and [sops](https://github.com/getsops/sops) to manage secrets. - **Required:** Some knowledge of [Git](https://git-scm.com/) practices & terminology. - **Components:** [flux](https://github.com/fluxcd/flux2), [cert-manager](https://github.com/cert-manager/cert-manager), [spegel](https://github.com/XenitAB/spegel), [reloader](https://github.com/stakater/Reloader), [system-upgrade-controller](https://github.com/rancher/system-upgrade-controller), and [openebs](https://github.com/openebs/openebs). 3. **"Flux cluster with Cloudflare"** - An addition to "**Flux cluster**" that provides DNS and SSL with [Cloudflare](https://www.cloudflare.com/). [Cloudflare Tunnel](https://www.cloudflare.com/products/tunnel/) is also included to provide external access to certain applications deployed in your cluster. - **Required:** A Cloudflare account with a domain managed in your Cloudflare account. - **Components:** [ingress-nginx](https://github.com/kubernetes/ingress-nginx/), [external-dns](https://github.com/kubernetes-sigs/external-dns) and [cloudflared](https://github.com/cloudflare/cloudflared). **Other features include:** - A [Renovate](https://www.mend.io/renovate)-ready repository with pull request diffs provided by [flux-local](https://github.com/allenporter/flux-local) - Integrated [GitHub Actions](https://github.com/features/actions) with helpful workflows. ## 💻 Machine Preparation Hopefully some of this peeked your interests! If you are marching forward, now is a good time to choose whether you will deploy a Kubernetes cluster with [k3s](https://github.com/k3s-io/k3s) or [Talos](https://github.com/siderolabs/talos). ### System requirements > [!NOTE] > 1. The included behaviour of Talos or k3s is that all nodes are able to run workloads, **including** the controller nodes. **Worker nodes** are therefore **optional**. > 2. Do you have 3 or more nodes? It is highly recommended to make 3 of them controller nodes for a highly available control plane. > 3. Running the cluster on Proxmox VE? My thoughts and recommendations about that are documented [here](https://onedr0p.github.io/home-ops/notes/proxmox-considerations.html). | Role | Cores | Memory | System Disk | |---------|----------|---------------|---------------------------| | Control | 4 _(6*)_ | 8GB _(24GB*)_ | 100GB _(500GB*)_ SSD/NVMe | | Worker | 4 _(6*)_ | 8GB _(24GB*)_ | 100GB _(500GB*)_ SSD/NVMe | | _\* recommended_ | ### Talos 1. Download the latest stable release of Talos from their [GitHub releases](https://github.com/siderolabs/talos/releases). You will want to grab either `metal-amd64.iso` or `metal-rpi_generic-arm64.raw.xz` depending on your system. 2. Take note of the OS drive serial numbers you will need them later on. 3. Flash the iso or raw file to a USB drive and boot to Talos on your nodes with it. 4. Continue on to 🚀 [**Getting Started**](#-getting-started) ### k3s (AMD64) 1. Download the latest stable release of Debian from [here](https://cdimage.debian.org/debian-cd/current/amd64/iso-dvd), then follow [this guide](https://www.linuxtechi.com/how-to-install-debian-12-step-by-step) to get it installed. Deviations from the guide: ```txt Choose "Guided - use entire disk" Choose "All files in one partition" Delete Swap partition Uncheck all Debian desktop environment options ``` 2. [Post install] Remove CD/DVD as apt source ```sh su - sed -i '/deb cdrom/d' /etc/apt/sources.list apt update exit ``` 3. [Post install] Enable sudo for your non-root user ```sh su - apt update apt install -y sudo usermod -aG sudo ${username} echo "${username} ALL=(ALL) NOPASSWD:ALL" | tee /etc/sudoers.d/${username} exit newgrp sudo sudo apt update ``` 4. [Post install] Add SSH keys (or use `ssh-copy-id` on the client that is connecting) 📍 _First make sure your ssh keys are up-to-date and added to your github account as [instructed](https://docs.github.com/en/authentication/connecting-to-github-with-ssh/adding-a-new-ssh-key-to-your-github-account)._ ```sh mkdir -m 700 ~/.ssh sudo apt install -y curl curl https://github.com/${github_username}.keys > ~/.ssh/authorized_keys chmod 600 ~/.ssh/authorized_keys ``` ### k3s (RasPi4)
Click here to read about using a RasPi4 > [!NOTE] > 1. It is recommended to have an 8GB RasPi model. Most important is to **boot from an external SSD/NVMe** rather than an SD card. This is [supported natively](https://www.raspberrypi.com/documentation/computers/raspberry-pi.html), however if you have an early model you may need to [update the bootloader](https://www.tomshardware.com/how-to/boot-raspberry-pi-4-usb) first. > 2. Check the [power requirements](https://www.raspberrypi.com/documentation/computers/raspberry-pi.html#power-supply) if using a PoE Hat and a SSD/NVMe dongle. 1. Download the latest stable release of Debian from [here](https://raspi.debian.net/tested-images). _**Do not** use Raspbian or DietPi or any other flavor Linux OS._ 2. Flash the image onto an SSD/NVMe drive. 3. Re-mount the drive to your workstation and then do the following (per the [official documentation](https://raspi.debian.net/defaults-and-settings)): ```txt Open 'sysconf.txt' in a text editor and save it upon updating the information below - Change 'root_authorized_key' to your desired public SSH key - Change 'root_pw' to your desired root password - Change 'hostname' to your desired hostname ``` 4. Connect SSD/NVMe drive to the Raspberry Pi 4 and power it on. 5. [Post install] SSH into the device with the `root` user and then create a normal user account with `adduser ${username}` 6. [Post install] Follow steps 3 and 4 from [k3s (AMD64)](##k3s-amd64). 7. [Post install] Install `python3` which is needed by Ansible. ```sh sudo apt install -y python3 ``` 8. Continue on to 🚀 [**Getting Started**](#-getting-started)
## 🚀 Getting Started Once you have installed Talos or Debian on your nodes, there are six stages to getting a Flux-managed cluster up and runnning. > [!NOTE] > For all stages below the commands **MUST** be ran on your personal workstation within your repository directory ### 🎉 Stage 1: Create a Git repository 1. Create a new **public** repository by clicking the big green "Use this template" button at the top of this page. 2. Clone **your new repo** to you local workstation and `cd` into it. 3. Continue on to 🌱 [**Stage 2**](#-stage-2-setup-your-local-workstation-environment) ### 🌱 Stage 2: Setup your local workstation You have two different options for setting up your local workstation. - First option is using a `devcontainer` which requires you to have Docker and VSCode installed. This method is the fastest to get going because all the required CLI tools are provided for you in my [devcontainer](https://github.com/onedr0p/cluster-template/pkgs/container/cluster-template%2Fdevcontainer) image. - The second option is setting up the CLI tools directly on your workstation. #### Devcontainer method 1. Start Docker and open your repository in VSCode. There will be a pop-up asking you to use the `devcontainer`, click the button to start using it. 2. Continue on to 🔧 [**Stage 3**](#-stage-3-bootstrap-configuration) #### Non-devcontainer method 1. Install the most recent version of [task](https://taskfile.dev/), see the [installation docs](https://taskfile.dev/installation/) for other supported platforms. ```sh # Homebrew brew install go-task # or, Arch pacman -S --noconfirm go-task && ln -sf /usr/bin/go-task /usr/local/bin/task ``` 2. Install the most recent version of [direnv](https://direnv.net/), see the [installation docs](https://direnv.net/docs/installation.html) for other supported platforms. ```sh # Homebrew brew install direnv # or, Arch pacman -S --noconfirm direnv ``` 📍 _After `direnv` is installed be sure to **[hook it into your preferred shell](https://direnv.net/docs/hook.html)** and then run `task workstation:direnv`_ 3. Install the additional **required** CLI tools 📍 _**Not using Homebrew or ArchLinux?** Try using the generic Linux task below, if that fails check out the [Brewfile](.taskfiles/Workstation/Brewfile)/[Archfile](.taskfiles/Workstation/Archfile) for what CLI tools needed and install them._ ```sh # Homebrew task workstation:brew # or, Arch with yay/paru task workstation:arch # or, Generic Linux (YMMV, this pulls binaires in to ./bin) task workstation:generic-linux ``` 4. Setup a Python virual environment by running the following task command. 📍 _This commands requires Python 3.11+ to be installed._ ```sh task workstation:venv ``` 5. Continue on to 🔧 [**Stage 3**](#-stage-3-bootstrap-configuration) ### 🔧 Stage 3: Bootstrap configuration > [!NOTE] > The [config.sample.yaml](./config.sample.yaml) file contains config that is **vital** to the bootstrap process. 1. Generate the `config.yaml` from the [config.sample.yaml](./config.sample.yaml) configuration file. ```sh task init ``` 2. Fill out the `config.yaml` configuration file using the comments in that file as a guide. 3. Run the following command which will generate all the files needed to continue. ```sh task configure ``` 4. Push you changes to git 📍 _**Verify** all the `./kubernetes/**/*.sops.*` files are **encrypted** with SOPS_ ```sh git add -A git commit -m "Initial commit :rocket:" git push ``` 5. Continue on to ⚡ [**Stage 4**](#-stage-4-prepare-your-nodes-for-kubernetes) ### ⚡ Stage 4: Prepare your nodes for Kubernetes > [!NOTE] > For **Talos** skip ahead to ⛵ [**Stage 5**](#-stage-5-install-kubernetes) #### k3s 📍 _Here we will be running an Ansible playbook to prepare your nodes for running a Kubernetes cluster._ 1. Ensure you are able to SSH into your nodes from your workstation using a private SSH key **without a passphrase** (for example using a SSH agent). This lets Ansible interact with your nodes. 3. Install the Ansible dependencies ```sh task ansible:deps ``` 4. Verify Ansible can view your config ```sh task ansible:list ``` 5. Verify Ansible can ping your nodes ```sh task ansible:ping ``` 6. Run the Ansible prepare playbook (nodes wil reboot when done) ```sh task ansible:run playbook=cluster-prepare ``` 7. Continue on to ⛵ [**Stage 5**](#-stage-5-install-kubernetes) ### ⛵ Stage 5: Install Kubernetes #### Talos 1. Create Talos Secrets and configuration ```sh task talos:gensecret task talos:genconfig ``` 2. Apply Talos Config ```sh task talos:apply ``` 3. Boostrap Talos and get kubeconfig ```sh task talos:bootstrap task talos:kubeconfig node=$master_node_ip_address ``` 4. Install Cilium and kubelet-csr-approver into the cluster ```sh task talos:apply-extras ``` #### k3s 1. Install Kubernetes depending on the distribution you chose ```sh # Install k3s task ansible:run playbook=cluster-installation ``` #### Cluster validation 1. The `kubeconfig` for interacting with your cluster should have been created in the root of your repository. 2. Verify the nodes are online 📍 _If this command **fails** you likely haven't configured `direnv` as mentioned previously in the guide._ ```sh kubectl get nodes -o wide # NAME STATUS ROLES AGE VERSION # k8s-0 Ready control-plane,etcd,master 1h v1.29.1 # k8s-1 Ready worker 1h v1.29.1 ``` 3. Continue on to 🔹 [**Stage 6**](#-stage-6-install-flux-in-your-cluster) ### 🔹 Stage 6: Install Flux in your cluster > [!NOTE] > Skip this stage if you have **disabled** Flux in the `config.yaml` 1. Verify Flux can be installed ```sh flux check --pre # ► checking prerequisites # ✔ kubectl 1.27.3 >=1.18.0-0 # ✔ Kubernetes 1.27.3+k3s1 >=1.16.0-0 # ✔ prerequisites checks passed ``` 2. Install Flux and sync the cluster to the Git repository 📍 _Run `task flux:github-deploy-key` first if using a private repository_ ```sh task flux:bootstrap # namespace/flux-system configured # customresourcedefinition.apiextensions.k8s.io/alerts.notification.toolkit.fluxcd.io created # ... ``` 1. Verify Flux components are running in the cluster ```sh kubectl -n flux-system get pods -o wide # NAME READY STATUS RESTARTS AGE # helm-controller-5bbd94c75-89sb4 1/1 Running 0 1h # kustomize-controller-7b67b6b77d-nqc67 1/1 Running 0 1h # notification-controller-7c46575844-k4bvr 1/1 Running 0 1h # source-controller-7d6875bcb4-zqw9f 1/1 Running 0 1h ``` ### 🎤 Flux w/ Cloudflare verification Steps _Mic check, 1, 2_ - In a few moments applications should be lighting up like Christmas in July 🎄 1. Output all the common resources in your cluster. 📍 _Feel free to use the provided [kubernetes tasks](.taskfiles/Kubernetes/Taskfile.yaml) for validation of cluster resources or continue to get familiar with the `kubectl` and `flux` CLI tools._ ```sh task kubernetes:resources ``` 2. ⚠️ It might take `cert-manager` awhile to generate certificates, this is normal so be patient. 3. 🏆 **Congratulations** if all goes smooth you will have a Kubernetes cluster managed by Flux and your Git repository is driving the state of your cluster. 4. 🧠 Now it's time to pause and go get some motel motor oil ☕ and admire you made it this far! ## 📣 Flux w/ Cloudflare post installation #### 🌐 Public DNS The `external-dns` application created in the `networking` namespace will handle creating public DNS records. By default, `echo-server-external` and the `flux-webhook` are the only subdomains reachable from the public internet. In order to make additional applications public you must set set the correct ingress class name and ingress annotations like in the HelmRelease for `echo-server`. #### 🏠 Home DNS `k8s_gateway` will provide DNS resolution to external Kubernetes resources (i.e. points of entry to the cluster) from any device that uses your home DNS server. For this to work, your home DNS server must be configured to forward DNS queries for `${bootstrap_cloudflare_domain}` to `${bootstrap_k8s_gateway_addr}` instead of the upstream DNS server(s) it normally uses. This is a form of **split DNS** (aka split-horizon DNS / conditional forwarding). > [!TIP] > Below is how to configure a Pi-hole for split DNS. Other platforms should be similar. > 1. Apply this file on the Pihole server while substituting the variables > ```sh > # /etc/dnsmasq.d/99-k8s-gateway-forward.conf > server=/${bootstrap_cloudflare_domain}/${bootstrap_k8s_gateway_addr} > ``` > 2. Restart dnsmasq on the server. > 3. Query an internal-only subdomain from your workstation (any `internal` class ingresses): `dig @${home-dns-server-ip} echo-server-internal.${bootstrap_cloudflare_domain}`. It should resolve to `${bootstrap_internal_ingress_addr}`. If you're having trouble with DNS be sure to check out these two GitHub discussions: [Internal DNS](https://github.com/onedr0p/cluster-template/discussions/719) and [Pod DNS resolution broken](https://github.com/onedr0p/cluster-template/discussions/635). ... Nothing working? That is expected, this is DNS after all! #### 📜 Certificates By default this template will deploy a wildcard certificate using the Let's Encrypt **staging environment**, which prevents you from getting rate-limited by the Let's Encrypt production servers if your cluster doesn't deploy properly (for example due to a misconfiguration). Once you are sure you will keep the cluster up for more than a few hours be sure to switch to the production servers as outlined in `config.yaml`. 📍 _You will need a production certificate to reach internet-exposed applications through `cloudflared`._ #### 🪝 Github Webhook By default Flux will periodically check your git repository for changes. In order to have Flux reconcile on `git push` you must configure Github to send `push` events to Flux. > [!NOTE] > This will only work after you have switched over certificates to the Let's Encrypt Production servers. 1. Obtain the webhook path 📍 _Hook id and path should look like `/hook/12ebd1e363c641dc3c2e430ecf3cee2b3c7a5ac9e1234506f6f5f3ce1230e123`_ ```sh kubectl -n flux-system get receiver github-receiver -o jsonpath='{.status.webhookPath}' ``` 2. Piece together the full URL with the webhook path appended ```text https://flux-webhook.${bootstrap_cloudflare_domain}/hook/12ebd1e363c641dc3c2e430ecf3cee2b3c7a5ac9e1234506f6f5f3ce1230e123 ``` 3. Navigate to the settings of your repository on Github, under "Settings/Webhooks" press the "Add webhook" button. Fill in the webhook url and your `bootstrap_flux_github_webhook_token` secret and save. ## 💥 Nuke There might be a situation where you want to destroy your Kubernetes cluster. This will completely clean the OS of all traces of the Kubernetes distribution you chose and then reboot the nodes. ```sh # Nuke k3s task ansible:run playbook=cluster-nuke ``` ## 🤖 Renovate [Renovate](https://www.mend.io/renovate) is a tool that automates dependency management. It is designed to scan your repository around the clock and open PRs for out-of-date dependencies it finds. Common dependencies it can discover are Helm charts, container images, GitHub Actions, Ansible roles... even Flux itself! Merging a PR will cause Flux to apply the update to your cluster. To enable Renovate, click the 'Configure' button over at their [Github app page](https://github.com/apps/renovate) and select your repository. Renovate creates a "Dependency Dashboard" as an issue in your repository, giving an overview of the status of all updates. The dashboard has interactive checkboxes that let you do things like advance scheduling or reattempt update PRs you closed without merging. The base Renovate configuration in your repository can be viewed at [.github/renovate.json5](./.github/renovate.json5). By default it is scheduled to be active with PRs every weekend, but you can [change the schedule to anything you want](https://docs.renovatebot.com/presets-schedule), or remove it if you want Renovate to open PRs right away. ## 🐛 Debugging Below is a general guide on trying to debug an issue with an resource or application. For example, if a workload/resource is not showing up or a pod has started but in a `CrashLoopBackOff` or `Pending` state. 1. Start by checking all Flux Kustomizations & Git Repository & OCI Repository and verify they are healthy. ```sh flux get sources oci -A flux get sources git -A flux get ks -A ``` 2. Then check all the Flux Helm Releases and verify they are healthy. ```sh flux get hr -A ``` 3. Then check the if the pod is present. ```sh kubectl -n get pods -o wide ``` 4. Then check the logs of the pod if its there. ```sh kubectl -n logs -f # or stern -n ``` 5. If a resource exists try to describe it to see what problems it might have. ```sh kubectl -n describe ``` 6. Check the namespace events ```sh kubectl -n get events --sort-by='.metadata.creationTimestamp' ``` Resolving problems that you have could take some tweaking of your YAML manifests in order to get things working, other times it could be a external factor like permissions on NFS. If you are unable to figure out your problem see the help section below. ## 👉 Help - Make a post in this repository's Github [Discussions](https://github.com/onedr0p/cluster-template/discussions). - Start a thread in the `#support` or `#cluster-template` channels in the [Home Operations](https://discord.gg/home-operations) Discord server. ## ❔ What's next The cluster is your oyster (or something like that). Below are some optional considerations you might want to review. #### Ship it To browse or get ideas on applications people are running, community member [@whazor](https://github.com/whazor) created [Kubesearch](https://kubesearch.dev) as a creative way to search Flux HelmReleases across Github and Gitlab. #### Storage The included CSI (openebs in local-hostpath mode) is a great start for storage but soon you might find you need more features like replicated block storage, or to connect to a NFS/SMB/iSCSI server. If you need any of those features be sure to check out the projects like [rook-ceph](https://github.com/rook/rook), [longhorn](https://github.com/longhorn/longhorn), [openebs](https://github.com/openebs/openebs), [democratic-csi](https://github.com/democratic-csi/democratic-csi), [csi-driver-nfs](https://github.com/kubernetes-csi/csi-driver-nfs), and [synology-csi](https://github.com/SynologyOpenSource/synology-csi). ## 🙌 Related Projects If this repo is too hot to handle or too cold to hold check out these following projects. - [khuedoan/homelab](https://github.com/khuedoan/homelab) - _Modern self-hosting framework, fully automated from empty disk to operating services with a single command._ - [danmanners/aws-argo-cluster-template](https://github.com/danmanners/aws-argo-cluster-template) - _A community opinionated template for deploying Kubernetes clusters on-prem and in AWS using Pulumi, SOPS, Sealed Secrets, GitHub Actions, Renovate, Cilium and more!_ - [ricsanfre/pi-cluster](https://github.com/ricsanfre/pi-cluster) - _Pi Kubernetes Cluster. Homelab kubernetes cluster automated with Ansible and ArgoCD_ - [techno-tim/k3s-ansible](https://github.com/techno-tim/k3s-ansible) - _The easiest way to bootstrap a self-hosted High Availability Kubernetes cluster. A fully automated HA k3s etcd install with kube-vip, MetalLB, and more_ ## ⭐ Stargazers
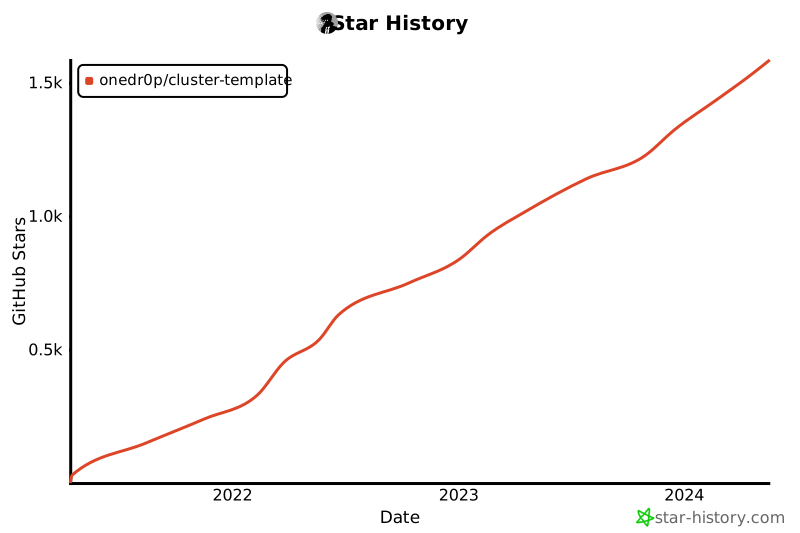
[![Star History Chart](https://api.star-history.com/svg?repos=onedr0p/cluster-template&type=Date)](https://star-history.com/#onedr0p/cluster-template&Date)
## 🤝 Thanks Big shout out to all the contributors, sponsors and everyone else who has helped on this project.